Sunday, January 3, 2016

Keeping People Updated in the New Year


Teachers are often required to have a web page. Many will readily tell you that they are not web page designers, they are teachers. Therefore, I have found a simple way for teachers to create and update web pages.

To accomplish this, a teacher simply follows these steps
  • Open Google drive
  • Click on NEW
  • Click on Google Doc
  • Name the document
  • Type information on the page
  • Click on File
  • Click on Publish to the Web
  • Click on Publish
  • Click OK (you are sure you want to publish)
  • Screen Shot 2016-01-03 at 5.29.33 PM.png
    A screen appears with the link to send to your district’s webmaster
    • Click on the envelope icon (Gmail) and your e-mail will open where you can type in your webmaster’s e-mail address and the link will already be in the body of the e-mail for your district webmaster to create a link off of the district web page to your web page.
    • Once this link is connected, you don’t have to work with the webmaster again. Your page becomes live at that moment. All new changes will automatically appear on the published page.
  • You now have an easy way to keep parents current on all events
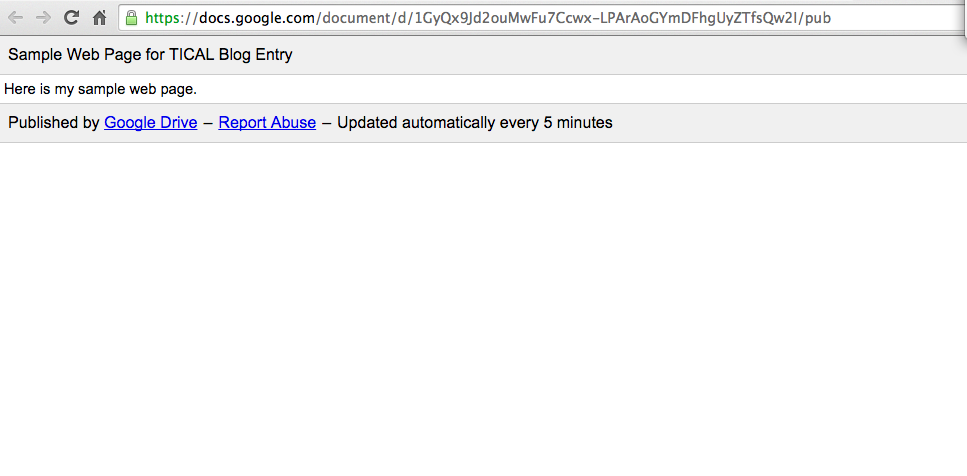
  • Here is a link to a sample, very simple published doc as a web page

Now, a couple of notes
  • It’s really plain. However, I believe most people just want to know current information and aren’t as concerned about the looks.
  • It does take 5 minutes sometimes to update, so be patient if you type into a document and it hasn’t appeared on your published document yet.

The first time I presented this to teachers, they were blown away that it was really that easy. Most importantly, since presenting this over 2 years ago to a group of teachers, they are still doing weekly updates on their web pages.  
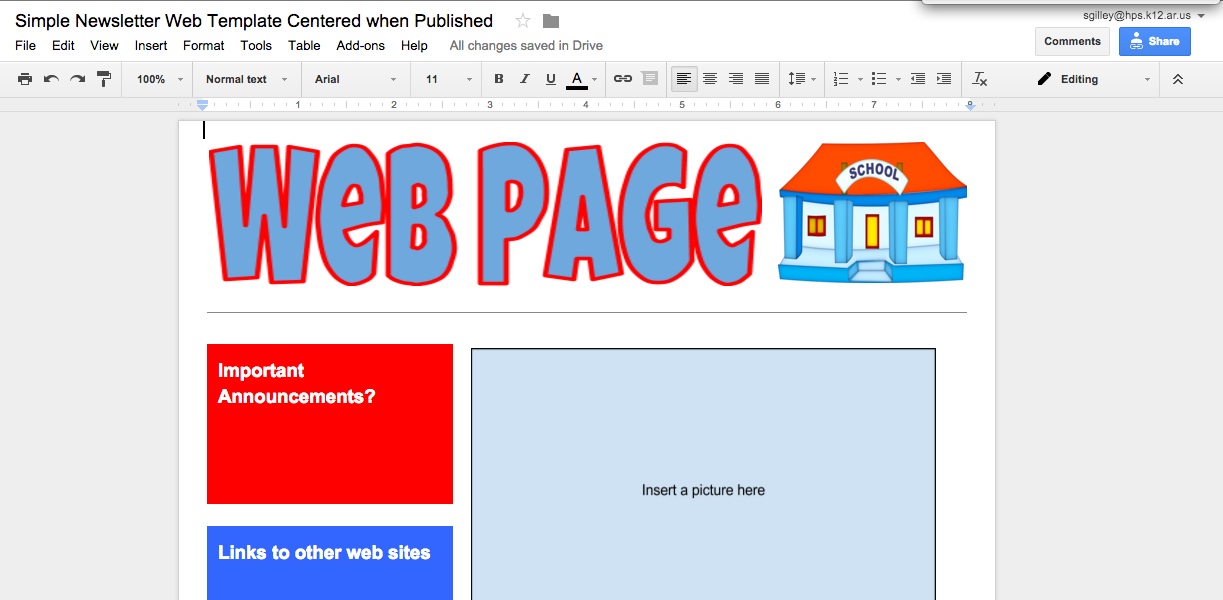
Screen Shot 2016-01-03 at 5.42.42 PM.png
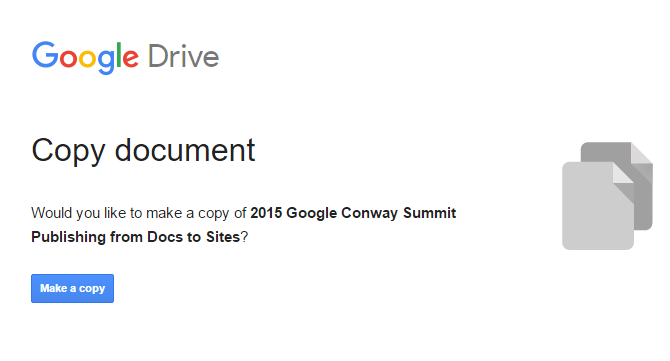
Many people just can’t accept the plain simplicity of the regular document, so I offer this alternative which is simply a formatted, centered table within a Google doc. The instructions to publish are the same as above, but you start with making a copy of this document.

Let me know how this works for you and I'd love to share the pages you create using this method.

Monday, December 7, 2015

December Tidbit #2: Forcing the Make a Copy Option in Google Docs.

Many times you want to share a document with others where they can view what you have done. Often, you not only want them to view it, but you want them to use that as a starting point for them to then tweak the document and make it their own. This is easily done by
  • clicking on share
  • typing in their e-mail address
  • and selecting the view option
  • click done and an e-mail will go to them allowing them to view your document

In order for them to then, in turn, work on it, they must open the document, then click on file, make a copy and name the document for their use.


Sometimes, though, it’s nice for the link that you send them to automatically ask them to Make a Copy of the google document. You follow the same steps as above:
  • Click on share
  • Type in their e-mail address, select view
  • BUT, then uncheck the e-mail option so it doesn’t e-mail them that you have shared a document
  • Copy the highlighted URL that appears.
  • Open your e-mail account.
  • Create a new e-mail to the person you want to send the document so that they can make a copy.
  • Paste the URL that you copied from above:


  • Erase everything after the last slash AND make the following change:


  • Click to send the e-mail.
  • Now when the recipient clicks on the link, it will ask them if they want to Make a Copy of the document and the document will automatically appear in their Google drive.

Tuesday, December 1, 2015

December Tip of the Month - Animated Gifs

Adding an Animated gif to a Published Google Document

I love the option of publishing Google Documents as web pages. However, I know that some people would like them to be a little jazzier. How about this option for snazzier pictures?

Step One
  • Go to images.google.com and type in animated gif in the search bar. You will find a ton of possibilities. If there is a particular animated gif you might be interested in, add that information in front of the search criteria.
  • For today, let’s search for Christmas animated gif
  • I've posted a sample inserted animated gif to the right.

Step Two
  • When you click on the different pictures that show up, you will be able to tell if they are animated or not.
  • You will either get a still picture or a picture with movement.
  • Once you have selected the picture you want to use, click on view image on the right hand side of your screen.

Step Three
  • Copy the address URL at the top of your web browser for the animated gif that you have selected. (click on the address bar - the URL should highlight - click <CTRL><C>

Step Four
  • Open your Google document that is your published web page.
  • Select a location to place your animated picture.
  • Click on that selected location
  • Click on insert - image
  • Click on By URL in the menu that pops up
  • Paste your URL in the URL area
  • Click Select at the bottom.
  • Your animated GIF now appears on your published web page

If you haven't used published Google document pages as web pages, you are definitely missing out on simple ways to keep people updated and informed.

Monday, November 16, 2015

November Tip of the Month

Editing a PDF.  


Did you ever wish you could edit a PDF. Google docs allows you to do that natively within docs. 
  • Upload your PDF file into a folder on your google drive.  
  • Once the document is uploaded, right click on the document and click on Open With Google Docs. 
  • The document will convert and be available. 
  • HERE’S the BIGGEST key. At first, it appears that it’s just a picture of the document and that you cannot edit individual words. 
  • When you click on that picture of the document, hit the <DELETE> key. 
  • The picture of the document disappears and all of the words appear for you to edit.
Try it out and let me know what you think in the comments.
(NOTE: This does not work to convert documents with multiple tables and/or graphics)

Saturday, June 6, 2015

June Tip for Google Forms

Google forms are great for getting feedback and information.  They are easy to set up and link to a web page.  One complaint I always hear is that once they set up their form and tweak it, the spreadsheet of responses doesn't look right.  When they look at their spreadsheet, the column headings don't line up with the order of their form questions.  Here is a simple trick that will make sure that those always line up.

Step One - Create your form
Step Two - Edit the form - tweak - adjust - move items - copy items - etc.
Step Three - Test the form and make sure you are getting the information you want
Step Five - Click on view responses - If you have made alot of changes as you were creating your form, chances are good that the column headings don't line up with the order of your form questions

SUPER SIMPLE FIX
  • Go back to your form
  • Click on Responses on the menu bar at the top
  • Click on Change response destination
Now, when you click on view responses, the column headings in your spreadsheet will line up in the order of your form questions.  Do this when you are confident that you are finished with your form.  THEN, you are ready to publish your form link and start accepting responses.  I hope this helps you out.  As always, it's not what you know, but what you SHARE!

Thursday, May 7, 2015

April and May Tech Tidbit

Many schools in Arkansas are transitioning to new ways to hosting their web pages.  Our district is transitioning to Google Sites.  Since we are a Google Apps for Education school district, it just makes sense to make the platform for our web pages to be a Google Site. Creating the template site and adding users to collaborate on site creation has been an interesting, evolving, and learning process.

One of the first things I discovered is that when you share a Google Site with other people, they really don't have access to all of the features. One of the biggest things that is missing is access to the site layout.  This is where users have the opportunity to add URLs to specific sites and or re-arrange the arrangement of drop down menus across the top or as a sidebar.

So, in true Susan Gilley fashion, once I learn something or document steps on how to do it, it's time to share it with others.  This link provides instructions on how you make use of the webmaster tools to add users and allow them to be owners with you on a created site which in turn allows them to be true shared partners on your website. Some of you may not desire that kind of access.  However, in my district, being the district web master, I wanted to be able to create their sites, help if needed, but allow them the freedom to be in control as well.  I hope you find these instructions helpful.


Sunday, March 1, 2015

March's Tool of the Month

If I have one claim to fame, it is that I can type amazingly well.  I taught students to keyboard for over 15 years and meet several students today that say that these skills are serving them well. However, as we progress in technology and many students are teaching themeslves to type (keyboard), we are seeing less students with good skills.  They have already developed many bad hunt-and-peck habits that are hard to break because that method is adequate for their needs. They are resistant to change. Today's tool is another reason many of them feel touch keyboarding skills are not necessary.


Most students have a smart phone or a tablet. When they open notepad, or even a google doc in the docs app, the keyboard automatically appears. Immediately left of the space bar, is a microphone.  Many students, whose keyboarding skill is not up to par, can easily tap the microphone and start speaking what they would like to type (write). Try it out for yourself. I find that it works very well and understands a variety of voices. It even lets you add punctuation. Personally, I discovered that I can think and type easier than I can think and speak. Some people have shared with me that they are not composition typists at all. Thought composition skills are something we should focus on for our students. Good communication skills to compose, speak and present and/or type (key) may be one of the most important skills we can help children develop.


Since I have shared this tool with many people, several have asked about a microphone for chromebooks.  Good NEWS!  There is now an add-on with Google docs called speech recognition. To me, it doesn't understand and translate quite as well as the microphone on a tablet or phone, but still works very well. 

Try out both of these tools and share your results and thoughts in the comments. It's not what you know, it's what you SHARE!